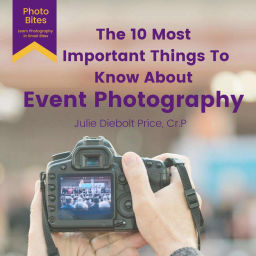
The 10 Most Important Things to Know About Event Photography
Julie Diebolt Price
- 19
- Episodes
- Bi-weekly
- Cadence
- 2024
- First episode
About The 10 Most Important Things to Know About Event Photography
This podcast is for Public Relations professionals who must photograph their events because the budget doesn’t allow for hiring a professional photographer or they think they don’t need one. It's also for Novice photographers who want to expand their offerings with event photography and will find this introduction practical and informative. juliedieboltprice.substack.com (https://juliedieboltprice.substack.com/s/photo-travel-write-newsletter?utm_medium=podcast)
- Publisher
- Julie Diebolt Price
- Category
- education · education
- Language
- en
- Explicit
- No
- First episode
- 15 Aug 2024
- Latest episode
- 27 Mar 2026
Latest episodes
19 episodes in the feed.
27 Mar 2026
Photo Friday - Why This Courtyard Composition Works So Well
I’ve seen plenty of beautiful spaces that fall flat in a photo. Pretty architecture alone does not carry an image very far. The frame still needs order. It still needs a path. It still needs a reason for the eye to move from one place to the next. That is why this image works. Your eye starts at the water in the foreground, moves through the repeated arches, and lands on the statue in the background. Nothing feels accidental. The composition does the heavy lifting. The Critique The eye gets clear instructions This frame does not leave the viewer guessing. The eye enters at the water feature in the foreground, rides those lines forward, and lands on the statue. That is one of the biggest reasons the image feels strong. The subject is not buried in the scene. The composition escorts the viewer straight to it. That kind of control makes a photo feel intentional fast. The hanging star adds tension The hanging star earns its place, but it also tests the balance a little. It gives the upper half of the frame something to do. Without it, the top section might feel attractive but too predictable, with brick, arches, and railings repeating without interruption. The star breaks that pattern and keeps the eye moving upward. It also pulls hard for attention. The star is bright, isolated, and geometric. The statue is softer and lower in the frame. For a moment, the eye has to decide where to settle. In this case, the statue still wins because the rest of the composition keeps pushing attention back to it. That is not a flaw. It is a small tension point, and sometimes a picture benefits from that. The arches create rhythm and structure The repeated arches on both sides of the frame do a lot of heavy lifting. They create a pattern, and the pattern gives the eye something reliable to follow. In a scene with brick texture, railings, furniture, plants, water, and sculpture all sharing space, repetition keeps the frame from slipping into visual chatter. The arches also create rhythm. One arch leads to the next, then the next, and that repeated shape gives the courtyard a calm, deliberate pace. The result feels orderly without feeling stiff. Converging lines pull the viewer inward The architecture narrows as it recedes into the background, and those converging lines give the image depth. That perspective helps the courtyard feel like a real space the viewer can enter, not just a decorative setting. It pulls the eye inward and strengthens the journey from foreground to background. The lines do not call attention to themselves, but they do their job well. The statue gets strong natural framing The statue benefits from a built-in frame. The rear arch wraps around it and gives it a clear place to live inside the image. That matters because this scene has enough detail to overwhelm a weaker subject. Without that arch, the statue could have blended into the brick, railings, and plants behind it. Then the darker recess behind the statue strengthens the effect even more. So the framing happens in layers: * The courtyard contains the full scene * The rear arch isolates the statue * The darker background helps the statue pop That is smart composition. Light and dark create visual rhythm The statue catches light, and the darker space around it acts almost like a natural frame. That contrast gives the statue immediate presence. The eye usually goes to the brightest important area first, and here that bright area is exactly where it should be. The rhythm between light and dark continues across the whole image. Bright floor. Dark water. Lit stone. Shadowed openings. Bright statue. Dark recess. That back-and-forth keeps the frame active and helps the viewer stay engaged. The water feature does more than fill the foreground The water feature is not dead space. It is a directional tool. Its edges point straight to the statue, which gives the whole image purpose from front to back. Even the stone spheres help by repeating along the path and nudging the eye forward. A weak foreground just takes up room. This one earns its space. Thanks for reading The Ageless Adventurer! This post is public, so feel free to share it. Final Thoughts Good composition rarely shouts. It nudges, points, frames, and repeats until the viewer arrives exactly where you wanted them to go. This image does that beautifully. If you are working on your own photos this week, look at your frame and ask one blunt question: Where does the eye go first, and who put it there? Takeaways * Leading lines matter: The edges of the water feature pull the eye straight to the statue. * Repetition creates order: The arches on both sides give the image structure and rhythm. * Framing strengthens the subject: The rear arch and darker recess help the statue stand out. * Light and dark do real work: The bright statue against the darker background creates natural emphasis. * Secondary elements can help or compete: The hanging star adds interest, but it comes close to stealing attention. The Ageless Adventurer is a reader-supported publication. To receive new posts and support my work, consider becoming a free or paid subscriber. You don’t have to figure out your camera alone. I’ve helped hundreds of students move from frustration to confidence behind the lens—mastering their cameras, improving composition, and building simple workflows that make photography fun again. 👉 Let’s get started Read the last Photo Friday. It’s about Stop Pinching Your iPhone Photos (https://juliedieboltprice.substack.com/p/photo-friday-stop-pinching-your-iphone?r=om4ah)—take a look and compare your take with mine. If today’s tip helped you frame it, name it, or claim it, flash a few bucks my way. Focused minds keep this magic moving! This is a public episode. If you'd like to discuss this with other subscribers or get access to bonus episodes, visit juliedieboltprice.substack.com/subscribe (https://juliedieboltprice.substack.com/subscribe?utm_medium=podcast&utm_campaign=CTA_2)
23 Jan 2026
Photo Friday - Red Pears and Bold Patterns Create Frame-Filling Photos
When one subject repeats from edge to edge, the photo stops “documenting” and starts designing—with color and rhythm doing most of the work. You’ve seen this kind of image before: one simple thing, repeated until it becomes a pattern. In this case, red pears piled in a harvest bin. No horizon. No “main” pear. Just abundance, texture, and color, wall-to-wall. That’s not an accident. That’s a compositional choice. Why One Repeated Subject Works Repetition creates rhythm Repetition gives your viewer a beat to follow—pear, pear, pear—like a visual drumline. The eye moves smoothly because it knows what to expect, even while it discovers small differences. Edge-to-edge makes it feel endless When the subject touches every edge of the frame, the pile feels bigger than the photo. Your brain assumes it continues outside the borders. That’s how you turn a simple bin into a statement about plenty. Small variations keep it alive Even in a “repetition” photo, nothing matches perfectly: * a stem pointing a new direction * a pear with deeper burgundy skin * a bruise, a scuff, a dusty bloom * a stray leaf tucked between fruit Those tiny imperfections add realism and keep the image from looking flat or fake. Why Red Pears Pop Red pulls attention fast. It signals: * energy * ripeness * sweetness * appetite * warmth But this isn’t one solid red. It’s a whole range, including pink, crimson, raspberry, and even a few pears leaning toward purple. That range gives depth. It also makes the photo feel tactile, as if you could almost feel the pear's skin. Teaching note: Monochromatic color (one color family) can look “simple,” but it often reads as bold because it feels intentional. Thanks for reading The Ageless Adventurer! This post is public, so feel free to share it. The Harvest Story Behind the Image Images like this don’t happen in isolation. They come from a season and a process. What harvesting looks like (in real life) During harvest, pears move quickly: * picked by hand and placed into bags or bins * sorted by size and quality * packed for shipping or brought to farm stands * stacked in bins like this, ready for the next step That bin moment matters because it tells a story: fresh, just picked, not styled. Viewers trust it. When to shoot: harvest season If you want photos like this, plan for harvest time in your region, usually late summer through fall, depending on the variety and climate. Best places to find scenes like this: * orchards during U-pick days * packing sheds (ask permission) * farmers’ markets early in the morning * roadside fruit stands that stack produce in bins How to Capture This Look Without Overthinking It 1) Fill the frame on purpose Move closer until you remove the “extra.” No sky. No ground. No table edge. Let pears dominate the entire picture. Quick check: scan your edges. If you see empty gaps or odd distractions, shift your position. 2) Choose light that shows texture Great light for produce: * open shade (soft, even, rich color) * early morning or late afternoon (warm, dimensional) * cloudy bright (low contrast, very forgiving) Avoid harsh midday sun if you can—it creates shiny hot spots and heavy shadows between fruit. 3) Use settings that hold detail A solid starting point: * Aperture: f/4 to f/8 (texture + enough depth) * Shutter: 1/125 or faster if handholding * ISO: as low as your light allows If you want every pear sharp, stop down more (f/8–f/11) and keep the camera steady. 4) Focus like a designer Pick one “plane” of pears and lock focus there. It’s usually the pears closest to the center. If everything goes equally sharp, the image can feel busy. A little softness toward the edges can feel natural and pleasing. 5) Edit to honor the color In post, aim for: * slightly lifted shadows (so dark gaps don’t swallow detail) * controlled highlights (so shine doesn’t look plastic) * natural saturation (rich, not neon) Why People Love These Images These photos hit a few human buttons: * Abundance: a full bin feels satisfying * Order inside chaos: repetition calms the brain * Nostalgia: harvest scenes remind people of seasons, family, and tradition * Texture: viewers can “feel” the surface with their eyes * Design: they work as backgrounds, prints, packaging, and social posts In short, they’re simple, but they don’t feel empty. Try This: A 10-Minute Repetition Challenge Next time you see a repeated subject—fruit, flowers, books, chairs—do this: * shoot one frame that includes context (the stand, the orchard, the market) * then step in and shoot edge-to-edge repetition * take one version straight-on, one at a slight angle, and one from above Compare them later. One will feel more “graphic.” One will feel more “real.” You’ll learn your preference fast. Final Thought A bin of red pears might not look like “art” at first glance. But when you commit to color and repetition, and let the subject run from edge to edge, you create a photo that feels both honest and designed. If you have specific how-to photography questions, here’s the link to book a quick Zoom call with me: Takeaways * Fill the frame for instant impact. When one subject repeats edge-to-edge, the image feels bigger than the photo and reads as a bold design choice. * Let repetition create rhythm. Similar shapes guide the viewer’s eye, while small differences (stems, scuffs, tones) keep the pattern alive. * Use harvest season for built-in storytelling. Bins, sorting, and abundance add context—your photo carries a “fresh-picked” narrative without extra props. * Soft, even light makes color look rich. Open shade or overcast light holds detail and texture, keeping reds vibrant without harsh glare. * People love these images because they feel satisfying. They signal abundance, order, and texture—perfect for prints, backgrounds, and scroll-stopping visuals. The Ageless Adventurer is a reader-supported publication. To receive new posts and support my work, consider becoming a free or paid subscriber. You don’t have to figure out your camera alone. I’ve helped hundreds of students move from frustration to confidence behind the lens—mastering their cameras, improving composition, and building simple workflows that make photography fun again. 👉 Let’s get started Read the last Photo Friday. It’s about Negative Space and Balance (https://juliedieboltprice.substack.com/p/photo-friday-negative-space-and-balance)—take a look and compare your take with mine. This is a public episode. If you'd like to discuss this with other subscribers or get access to bonus episodes, visit juliedieboltprice.substack.com/subscribe (https://juliedieboltprice.substack.com/subscribe?utm_medium=podcast&utm_campaign=CTA_2)
16 Jan 2026
Photo Friday - Negative Space and Balance
I’ve watched photographers chase “the subject” for decades. They lock focus, nail exposure, and still end up with a photo that feels… off. Not wrong. Just restless. Most of the time, the fix doesn’t live in the subject. The fix lives around the subject. That space—sky, wall, water, shadow, blur, plain distance—doesn’t sit there doing nothing. It does heavy lifting. It shapes the mood. It controls the pace. It tells the viewer where to look and how long to stay. What negative space actually does Negative space gives your subject room to breathe. It also gives the viewer a place to rest. When you use it well, you get: * Clarity: the subject pops without shouting * Emotion: calm, loneliness, freedom, suspense, elegance * Focus: the viewer lands where you want them to land * Design: simple shapes and clean lines that feel intentional I think of negative space like silence in music. Silence doesn’t waste time. Silence creates meaning. Notice how you feel when you look at the picture above. The negative space around the subject’s heads creates a sense of calm. The white plates create little ponds of negative space and are balanced throughout the scene. Balance: the invisible “level” inside your frame Balance controls how the photo feels in your body. A balanced photo feels steady. An unbalanced one can feel tense or energetic—sometimes on purpose, sometimes by accident. Here’s what I look for before I press the shutter: * Visual weight: dark tones, bright highlights, sharp detail, faces, text, bold colors * Placement: weight near an edge pulls harder than weight near the center * Direction: a subject looking left creates “pull” toward the left The focal point in the photo above, the tagine in the center of the table, anchors the scene, and all table accessories are balanced around it. Notice how the tagine is placed between the two people. You could draw a diagonal line to their chins. The bread plate in the foreground frames the bottom of the picture, adding interest. A simple balance check I use I pause and ask: If I covered my subject, would the frame still feel organized?If the answer comes back “no,” I adjust my angle, my distance, or my background. If you have specific how-to photography questions, here’s the link to book a quick Zoom call: The background behind people’s heads is the make-or-break zone Nothing ruins a portrait faster than background clutter growing out of someone’s head. Poles, tree branches, signs, lamp posts, picture frames, bright windows—those distractions don’t feel “in the background” to a viewer. They feel attached to the person. The viewer can’t unsee them. My rule: protect the head zone I treat the space behind the head like sacred ground. I want it clear, clean, and simple. Here’s how I do it fast: * Shift left or right: one step often fixes a “branch head” problem * Change height: crouch or rise to slide the background away * Open up negative space: put sky, plain wall, shade, or soft blur behind the head * Watch bright spots: bright windows and sun patches pull attention away from faces * Use shallow depth of field: blur helps, but composition still wins If I can’t clean the head zone, I don’t shoot yet. I move first. Takeaways * Stop blaming the subject. When a photo feels “off,” the fix usually is in the space around the subject—background, edges, and empty areas. * Negative space does real work. Sky, walls, water, shadow, blur, and open distance guide the viewer’s eye, shape the mood, and slow the scene down. * Negative space boosts impact fast. Use it well, and you get clarity, emotion, focus, and clean design. Your subject stands out without fighting for attention. * Balance controls how a photo feels. A balanced frame reads steady and calm; an unbalanced frame can feel tense or energetic, sometimes on purpose, sometimes by accident. * Use the “cover the subject” test. If the frame doesn’t feel organized without the subject, adjust your position, distance, or background until it does. The Ageless Adventurer is a reader-supported publication. To receive new posts and support my work, consider becoming a free or paid subscriber. You don’t have to figure out your camera alone. I’ve helped hundreds of students move from frustration to confidence behind the lens—mastering their cameras, improving composition, and building simple workflows that make photography fun again. 👉 Let’s get started Read the last Photo Friday. It’s about the 3D Rule of Thirds (https://juliedieboltprice.substack.com/p/photo-friday-3d-rule-of-thirds?r=om4ah)—take a look and compare your take with mine. This is a public episode. If you'd like to discuss this with other subscribers or get access to bonus episodes, visit juliedieboltprice.substack.com/subscribe (https://juliedieboltprice.substack.com/subscribe?utm_medium=podcast&utm_campaign=CTA_2)
29 Aug 2025
Photo Friday - 3D Rule of Thirds
One of the quickest ways to make your photos stand out is to give them a true sense of depth. A flat image leaves your viewer at arm’s length, but a picture that shows foreground, middle ground, and background pulls them right into the scene. In today’s example image, you’ll see how these three layers work together to create a three-dimensional story. Why Foreground, Middle Ground, and Background Matter Think of your image as a stage. The foreground sets the scene and invites the viewer in. The middle ground is where the action unfolds, and the background provides context and atmosphere. When all three work in harmony, you get a photograph with height, depth, and impact—one that feels real and immersive. The Grid Is Your Secret Composition Tool I always keep the grid in mind—whether I’m peering through a camera viewfinder or framing with my iPhone’s LCD screen. The grid helps you organize these layers and keep balance in your composition. It’s not just about the rule of thirds (though that’s a big part of it); it’s about placing visual anchors in your frame so your viewer’s eye moves naturally from front to back. When you use the grid, you give your images structure. A mountain in the background sits right where it should, the subject in the middle ground holds attention, and a leading line in the foreground guides the eye. Without the grid, it’s easy to let elements drift and weaken the story. Final Thoughts Every image is an opportunity to create depth. Use foreground, middle ground, and background to tell a layered story, and let the grid guide your composition. With practice, it becomes second nature—and your photos will carry the kind of visual weight that makes people stop and look twice. Takeaways * Use all three layers—foreground, middle ground, and background—to create a sense of depth and invite the viewer into your photo. * Turn on or visualize the grid to help balance your composition and guide where elements belong in the frame. * Think in three dimensions—height and depth make images feel immersive, dynamic, and worth a second look. The Ageless Adventurer is a reader-supported publication. To receive new posts and support my work, consider becoming a free or paid subscriber. You don’t have to figure out your camera alone.I’ve helped hundreds of students move from frustration to confidence behind the lens—mastering their cameras, improving composition, and building simple workflows that make photography fun again. 👉 Let’s get started Read last week’s Photo Friday. It’s about 4 Simple Building Interior Photography Tips for Beginners—take a look and compare your take with mine. If today’s tip helped you frame it, name it, or claim it, flash a few bucks my way. Focused minds and full glasses keep this magic moving! This is a public episode. If you'd like to discuss this with other subscribers or get access to bonus episodes, visit juliedieboltprice.substack.com/subscribe (https://juliedieboltprice.substack.com/subscribe?utm_medium=podcast&utm_campaign=CTA_2)
22 Aug 2025
Photo Friday - 4 Simple Building Interior Photography Tips for Beginners
As a travel photographer and writer, I know a hotel isn’t just where you sleep—it’s the stage for the stories travelers take home. My goal is to share building interiors with readers that convey the mood, design, and promise of an unforgettable visit. Today, I’ll share four powerful techniques I use to capture hotel interiors that tell a story: leading lines, light and shadow, angles, and key features. With examples from real hotel photo shoots, you’ll see how each choice builds a narrative in your images. Apply these techniques to any interior–a home, museum, cathedral, or a restaurant–anywhere your travels lead you. Why Interior Photography Needs Storytelling Your viewers aren’t just looking at a room—they’re imagining themselves in it. A bland, evenly lit photo says “basic accommodation.” But thoughtful composition and lighting whisper “sanctuary,” “luxury,” or “adventure.” Leading Lines Guide the Eye Through the Space In building interiors, leading lines are everywhere: hallways, ceiling beams, carpet patterns, rows of light fixtures. Use them to pull the viewer’s gaze toward a key feature—like a grand chandelier or a sunlit sitting area. Pro Tip: When photographing a room, stand in a corner or doorway to find natural lines leading from the entrance to the furniture or window. This gives a sense of depth and invites the viewer into the space. Light and Shadow Set the Mood Light tells a story—warm golden rays across a bed suggest morning serenity, while cool evening shadows in a spa hint at luxurious calm. Don’t fight the available light; use it to craft the emotion you want to evoke. Pro Tip: Turn off all artificial lights and rely on natural light when possible. Watch for how shadows from furniture or décor create patterns or direction that add drama and dimension. Place Your Subject In The Foreground Eye-level shots are safe, but they rarely inspire. Change your perspective to show the subject’s features: * Shoot low to emphasize leading lines. * Place your subject in the foreground and allow the background to set it apart. * Use repetition with light and shadow to create an interesting background. Pro Tip: Walk the room before shooting. Try capturing from the doorway, then from each corner. You’ll see how the story shifts with each viewpoint. Focus on the Details That Define the Space In this photo, I wanted to show the unique refrigerator in the window seat. I’d never seen anything like it before, and I am sure many other people haven’t either. I isolated the appliance, opened the drawer to see into the interior, ensured there was enough light, and composed the image at an angle to fit as much of the fridge as possible into the frame. Zero in on these details to give readers a sense of place. Pro Tip: Frame out clutter so it doesn’t distract from the subject. Highlight only what supports the story of luxury, comfort, or uniqueness. Putting It All Together By Telling The Story Next time you’re photographing a building interior, think of the story arc: * Start with an establishing shot (a wide-angle view of the lobby or exterior). * Move to intimate storytelling details (a folded robe on the bed, a steaming espresso on the balcony). * Finish with hero shots (grand spaces that embody the building’s personality). Final Thoughts Every building interior has a story to tell. As a photographer, your goal is to find it in the architecture, décor, and light—and translate it into images that invite the viewer to step inside. If you want your interior images to stand out in print or online features, practice these four techniques and watch how your photos begin to tell a story. Takeaways * Tell the story of the space – Use interiors as stages for traveler experiences, not just background décor. * Shape emotion with composition and light – Leading lines, shadows, and natural light turn ordinary photos into immersive scenes. * Focus on angles and details – Unique perspectives and standout features create a narrative arc that draws viewers in. The Ageless Adventurer is a reader-supported publication. To receive new posts and support my work, consider becoming a free or paid subscriber. You don’t have to figure out your camera alone.I’ve helped hundreds of students move from frustration to confidence behind the lens—mastering their cameras, improving composition, and building simple workflows that make photography fun again. 👉 Let’s get started Read last week’s Photo Friday. It’s about Raising the Shadows Without Killing the Mood (https://juliedieboltprice.substack.com/p/photo-friday-raising-the-shadows?r=om4ah) — take a look and compare your take with mine. If today’s tip helped you frame it, name it, or claim it, flash a few bucks my way. Focused minds and full glasses keep this magic moving! This is a public episode. If you'd like to discuss this with other subscribers or get access to bonus episodes, visit juliedieboltprice.substack.com/subscribe (https://juliedieboltprice.substack.com/subscribe?utm_medium=podcast&utm_campaign=CTA_2)
1 Aug 2025
Photo Friday: Raising the Shadows Without Killing the Mood
When I Nearly Lost the Shot I remember photographing a wrangler at a dude ranch in Arizona. The golden hour light was stunning, but his hat cast deep shadows over his face. At first glance, I thought the photo was a loss—his expression completely hidden. But a little work in Lightroom saved it. I nudged up the Shadows slider, revealed his eyes and weathered skin, and preserved the drama of that western sunset. This technique has rescued more images than I care to admit—and it can work wonders for you, too. Why Raise Shadows? Shadows bring mood and mystery, but they shouldn’t swallow your subject. Raising shadows carefully helps reveal textures, colors, and faces that deserve the spotlight, without stripping your photo of depth or contrast. How to Lift Shadows Like a Pro In Adobe Lightroom Classic * Open the Develop Module – Import your photo. * Adjust Shadows – In the Basic panel, slowly drag the Shadows slider right until details emerge. * Tweak Contrast – Add a little contrast back to maintain depth. * Use Masking if Needed – Target just the dark areas to avoid affecting highlights. On the iPhone Photos App If you’re editing on your phone: * Open the Photos app, tap Edit. * Tap the adjustments dial and scroll to Shadows. * Slide right to lighten shadows, watching for natural balance. * Adjust Contrast if the image feels flat. When to Leave Shadows Alone Not every photo needs brightening. Sometimes deep shadows direct focus, build mood, or hide distractions. Over-editing can leave images lifeless. Trust your artistic eye—raise shadows only when it serves your story. Takeaways * Shadows add mood but can hide key details—edit with care. * Lightroom and iPhone Photos make it easy to reveal lost textures. * Avoid going too far; let some darkness stay for depth. You don’t have to figure out your camera alone.I’ve helped hundreds of students move from frustration to confidence behind the lens—mastering their cameras, improving composition, and building simple workflows that make photography fun again.👉 Let’s get started Read last week’s Photo Friday. It’s about Master the Rule of Thirds — take a look and compare your take with mine. If this post was picture-perfect or passport-worthy, don’t just scroll on—restack it or send it to a friend who needs a little creative layover. That’s how we keep this journey rolling. The Ageless Adventurer is a reader-supported publication. To receive new posts and support my work, consider becoming a free or paid subscriber. This is a public episode. If you'd like to discuss this with other subscribers or get access to bonus episodes, visit juliedieboltprice.substack.com/subscribe (https://juliedieboltprice.substack.com/subscribe?utm_medium=podcast&utm_campaign=CTA_2)
25 Jul 2025
Photo Friday - Master the Rule of Thirds for Eye-Catching Images
Want to take photos that instantly grab attention? The Rule of Thirds is one of the simplest ways to level up your composition—and I’ll show you how. With over 30 years as a professional photographer and author of multiple photography books, I’ve taught hundreds of students to “see” like a photographer. In today’s Photo Friday, I break down this classic rule so you can start framing images that feel balanced, dynamic, and professional—even with your phone. The Ageless Adventurer is a reader-supported publication. To receive new posts and support my work, consider becoming a free or paid subscriber. What Is the Rule of Thirds—and Why Does It Matter? The Rule of Thirds divides your frame into nine equal parts using two horizontal and two vertical lines—like a tic-tac-toe grid over your image. The idea? Place your subject where the lines cross, not dead center. Our eyes naturally land on these intersections, making your photo feel balanced and more engaging. Whether you’re shooting a sunset, a portrait, or your morning latte, shifting your subject off-center creates a sense of movement and adds a story to your image. Even the pros rely on this simple trick because it works across genres—from landscapes to street photography. How to Use the Rule of Thirds in Lightroom and on Your iPhone In Adobe Lightroom Classic * Open your photo in the Develop Module. * Select the Crop Overlay Tool (shortcut: R). * Watch as the Rule of Thirds grid appears over your photo. * Drag the corners or edges of your crop box to align your subject with a gridline or intersection. * Press Enter to apply your new composition. Pro Tip: Press O to explore other overlays and refine your composition with different guides. On Your iPhone * Go to Settings > Camera and toggle on Grid to activate the Rule of Thirds in your camera preview. * Open the Camera app. Use the grid to position your subject at a point of intersection while shooting. * Editing later? Open your photo in Photos, tap Edit, then select the Crop Tool. * Adjust your crop while using the grid to guide placement. * Tap Done to save. When to Break the Rule Rules are meant to be bent—or even broken—once you understand them. Go for centered compositions when you want symmetry, power, or simplicity. Think reflections, architectural shots, or portraits with direct eye contact. The key is making it intentional. Your Turn Try using the Rule of Thirds this week and share your results in the comments. Did it change the way you frame your shots? Or post one of your images, and I might feature it in a future Photo Friday critique! Takeaways * The Rule of Thirds gives your photos balance and energy by placing subjects off-center. * Turn on grids in your camera and editing tools to practice framing like a pro. * Break the rule intentionally when symmetry or simplicity enhances your shot. You don’t have to figure out your camera on your own.I’ve helped hundreds of students move from frustration to confidence behind the lens—mastering their cameras, improving composition, and building simple workflows that make photography fun again.👉 Let’s get started Read last week’s Photo Friday. It’s about Crop Like It’s Hot (https://open.substack.com/pub/juliedieboltprice/p/photo-friday-crop-it-like-its-hot?r=om4ah&utm_campaign=post&utm_medium=web&showWelcomeOnShare=true) (https://open.substack.com/pub/juliedieboltprice/p/photo-friday-crop-it-like-its-hot?r=om4ah&utm_campaign=post&utm_medium=web&showWelcomeOnShare=true)— take a look and compare your take with mine. If this snapshot of insight made you smile, forward it to a friend or hit that restack like it’s the shutter button on a once-in-a-lifetime trip. Sharing is caring—and it keeps the travel tales and photo tips coming! The Ageless Adventurer is a reader-supported publication. To receive new posts and support my work, consider becoming a free or paid subscriber. This is a public episode. If you'd like to discuss this with other subscribers or get access to bonus episodes, visit juliedieboltprice.substack.com/subscribe (https://juliedieboltprice.substack.com/subscribe?utm_medium=podcast&utm_campaign=CTA_2)
18 Jul 2025
Photo Friday: Crop It Like It’s Hot (Aspect Ratios Made Easy)
When I was photographing kayak guides from Ride the Wind Surf & Kayak (https://surfocracoke.com/) launching from the beach at Ocracoke Island, I wanted it all in the frame—the neon kayaks lined up, the sandy shoreline, and that impossibly wide Carolina sky. So, I selected the trusty Ultra-Wide-Angle camera on my Apple iPhone. Perfect, right? Except later, there were distracting posts and the dock framing the bottom. It was messy, not exactly what I had in mind. Thankfully, Lightroom’s Auto Transform button saved the day (along with creative cropping and other enhancements). One click fixed the aspect ratio, fixed the warping, and turned my “almost” shot into a portfolio favorite. If you’ve ever had a wide-angle photo go a little… wonky, this one’s for you. Why Wide-Angle Distorts Wide-angle lenses (anything 35mm and under, especially 24mm, 18mm, or wider) tend to distort reality. They cram a huge field of view into your image, which makes straight lines bow out. Faces and objects near the frame edges can look unnaturally pulled. Great for drama—not so great for portraits or architecture unless you know how to fix it. Fix It Fast in Lightroom (Desktop or Mobile) Here’s how to straighten things out in seconds: * Open your photo in Lightroom. * Scroll to the Transform panel in the Develop module. * Click Auto—Lightroom analyzes the image and instantly fixes warped lines. * If needed, fine-tune with the Vertical, Horizontal, or Rotate sliders. * Save the settings as a preset if you often shoot at a wide angle. Pro Tip: Also, check Enable Profile Corrections under Lens Corrections to correct lens-specific distortions. Quick Fix in iPhone or Mac Photos Don’t use Lightroom? No problem: * Open your photo in the Photos app. * Tap Edit > Crop & Rotate > look for Perspective/Skew tools (iOS 17+). * Adjust the Vertical or Horizontal sliders until your lines look natural. * Save—and your photo is ready to share. When to Embrace the Warp Sometimes, distortion adds character. The wraparound look of a forest shot at 16mm? Gorgeous. A stretched foreground in a cityscape? It can feel cinematic. The trick is knowing when to fix it and when to let your lens’s quirks shine. Final Frame Wide-angle lenses give you the power to capture more of the world—but with great power comes… bowed perspectives. Luckily, Lightroom and Photos make fixing distortion effortless. So next time your shot looks like it went through a funhouse mirror, you’ll know how to rescue it. Bonus Did you notice how I placed the point of the kayak in the lower left corner, which draws the viewer’s eye into the image? Effective use of the Rule of Thirds. Takeaways * Wide-angle magic comes with a twist. These lenses stretch reality—amazing for landscapes, tricky for straight lines, and portraits. * Auto Transform = your secret weapon. In Lightroom, one click straightens horizons and fixes warped edges like a pro. * Don’t forget Lens Corrections. Enable it in Lightroom to automatically clean up subtle lens quirks. * Photos app can pinch-hit. On iPhone or Mac, use Perspective tools under Crop & Rotate to tidy up distortion fast. * Sometimes, let it warp! That sweeping, wraparound look? It might be precisely the vibe your photo needs. You don’t have to figure out your camera alone.I’ve helped hundreds of students move from frustration to confidence behind the lens—mastering their cameras, improving composition, and building simple workflows that make photography fun again.👉 Let’s get started Read last week’s Photo Friday. It’s about Remove Background Distractions Like a Pro (https://juliedieboltprice.substack.com/p/photo-friday-remove-background-distractions?r=om4ah) — take a look and compare your take with mine. If this helped you frame your thoughts or fueled your wanderlust, restack it or share it with your favorite travel buddy. It’s cheaper than airfare and way more inspiring than airline pretzels! This is a public episode. If you'd like to discuss this with other subscribers or get access to bonus episodes, visit juliedieboltprice.substack.com/subscribe (https://juliedieboltprice.substack.com/subscribe?utm_medium=podcast&utm_campaign=CTA_2)
11 Jul 2025
Photo Friday - Remove Background Distractions Like a Pro
You know that moment when you’ve nailed focus, exposure, and composition—only to spot a bright blue object peeking in the background? Or maybe it’s a rogue power line or someone wearing neon that pulls all the attention away from your subject. Whether sharp or blurred, our eyes are hardwired to pick out color and contrast—and yes, they’ll be distracted. That’s why learning to remove background distractions is one of the most valuable photography skills. It’s not just about saving an image; it’s about strengthening your story. Why Remove Distractions? * Background clutter competes with your subject for attention. * Strong colors or shapes in the background pull the eye away, even if they’re out of focus. * Clean backgrounds help your subject “pop” and create more emotional impact. How To Do It in Post-Processing Sometimes cropping isn’t enough (or isn’t even an option if it would cut into your subject). Instead, use editing tools to clean up: * Adobe Lightroom (Mobile & Desktop) – Use the Healing Brush or Content-Aware Remove to erase spots or lines. * iPhone Photos App – Tap Edit > Adjust > Selective > Use the “Warmth” or “Brightness” sliders on problem areas. (It’s surprisingly effective!) * Other Apps (Free & Paid) – Snapseed (free) features a “Healing” tool, while TouchRetouch (paid) efficiently removes power lines and objects. When Cropping Works Best Cropping can eliminate edge distractions fast. Just remember—tight crops may impact resolution for printing, so always check your final output size. Pro Tip: Train yourself to see distractions before you click the shutter. Reposition yourself, adjust your angle, or ask your subject to shift slightly. The less you have to fix later, the more time you’ll spend creating, not cleaning Welcome to Photo Friday, a weekly series where I break down one of my photographs—from how I composed the shot to how I used light and color to bring it to life. Think of it as a mini photography lesson designed to help you see with a photographer’s eye. Each week, I share: * One image I've captured, with a behind-the-scenes story * What worked (and sometimes what didn’t) * Tips on composition, lighting, color balance, and more The Ageless Adventurer is a reader-supported publication. To receive new posts and support my work, consider becoming a free or paid subscriber. You don’t have to figure out your camera alone.I’ve helped hundreds of students move from frustration to confidence behind the lens—mastering their cameras, improving composition, and building simple workflows that make photography fun again.👉 Let’s get started Read last week’s Photo Friday. It’s about Get Your Colors Right with White Balance (https://juliedieboltprice.substack.com/p/photo-friday-get-your-colors-right?r=om4ah)— take a look and compare your take with mine. If this snapshot of insight made you smile, forward it to a friend or hit that restack button, as if it were the shutter on a once-in-a-lifetime trip. Sharing is caring—and it keeps the travel tales and photo tips coming! This is a public episode. If you'd like to discuss this with other subscribers or get access to bonus episodes, visit juliedieboltprice.substack.com/subscribe (https://juliedieboltprice.substack.com/subscribe?utm_medium=podcast&utm_campaign=CTA_2)
27 Jun 2025
Photo Friday - The Art of Empty Space: How to Make Your Subject Pop in Photography
Julie Diebolt Price explores the art of using empty space in photography to emphasize the subject, simplify the story, and create mood, offering tips on angles and backgrounds.
20 Jun 2025
Photo Friday - 7 Quick Steps to Remove Unwanted Objects in Adobe Lightroom
Julie Diebolt Price demonstrates a seven-step process using Adobe Lightroom's AI-powered Remove Tool to efficiently eliminate unwanted objects from photos, saving time and improving image quality.
13 Jun 2025
Photo Friday - 7 Powerful Secrets That Will Transform Your Landscape Photography Today
Julie Diebolt Price analyzes a landscape photograph, revealing seven secrets involving composition, color, and perspective that enhance visual storytelling and draw viewers into the scene.
6 Jun 2025
Photo Friday - 5 Ways to Instantly Improve Your Environmental Portraits
Julie Diebolt Price shares five techniques for enhancing environmental portraits, including using shallow depth of field, strategic cropping, and head tilts to create dynamic and natural images.
30 May 2025
Photo Friday - How to improve this cheesecake composition; and it isn't about baking
JULIE DIEBOLT PRICE shares tips on cheesecake photography, emphasizing composition, white balance adjustments, and creative cropping techniques to enhance visual storytelling.
28 Feb 2025
Exploring Caribbean Cuisine: A Gourmet Travel Adventure
As a travel writer with a special section on my blog (PhotoTravelWrite.com (https://phototravelwrite.com/gourmet-travel/)) about Gourmet Travel, I’m exploring world cuisines. The closest I’ve gotten to the Caribbean islands is Key West, which doesn’t count. So, here’s what I’ve learned about Caribbean cuisine. Tell me your favorite Caribbean dish and what’s in it in the comments. About Caribbean Cuisine Caribbean cuisine is a fusion of African, Indigenous, European, and Asian influences, reflecting the region's diverse history and geography. Known for its bold, spicy, and flavorful dishes, Caribbean food varies significantly across the islands but shares common ingredients and techniques that reflect the region’s tropical climate and cultural blend. Main Ingredients Here's an overview of the main ingredients, characteristics, and customs of Caribbean cuisine: 1. Tropical Fruits * Mango * Papaya * Pineapple * Guava * Plantains * Bananas These fruits are central to Caribbean cuisine, used in savory and sweet dishes. 2. Root Vegetables (Ground Provisions) * Yams * Cassava * Sweet Potatoes * Taro * Breadfruit These starchy vegetables are staples, often boiled, mashed, or fried. 3. Seafood The Caribbean’s location makes seafood a major part of the diet. * Fish * Snapper * Grouper * Mahi-Mahi Salted fish, especially saltfish (cod), is a significant ingredient, often used in dishes like ackee and saltfish. * Lobster * Conch (I enjoyed the conch when I visited Islamorada last year) (It’s pronounced “konk”) * Shrimp * Crab 4. Meat and Poultry * Chicken (especially jerk chicken) * Goat (Particularly popular in curries and stews.) * Pork * Beef Often marinated in flavorful spices and grilled or stewed. Oxtail is used in hearty stews, especially in Jamaican cuisine. 5. Beans and Rice * Rice and peas A classic Caribbean dish made with rice, coconut milk, and beans (typically pigeon peas or red kidney beans). * Black beans * Pigeon peas * Chickpeas (chana) Often used in soups, stews, or rice dishes. 6. Spices and Herbs * Scotch Bonnet Peppers One of the hottest peppers, essential for jerk seasoning, and many spicy dishes. * Allspice (pimento), ginger, cloves, cinnamon, nutmeg, thyme, and bay leaves are frequently used to flavor dishes. * Green Seasoning A blend of herbs and spices like parsley, cilantro, green onions, thyme, garlic, and hot peppers, often used as a marinade or seasoning base. 7. Coconut Coconut milk and shredded coconut are widely used in curries, stews, and desserts, adding a rich, creamy flavor. 8. Rum A key ingredient in cooking and drinks, rum is distilled across the Caribbean and used to flavor cakes, sauces, and marinades. Characteristics 1. Fusion of Cultures Caribbean cuisine reflects a blend of African, Indigenous, European (mainly Spanish, French, British, and Dutch), and Asian (Indian, Chinese) influences, with each culture leaving its mark on the food. Roti and curry dishes reflect Indian influence, while pastelón (a plantain and meat casserole) and sofrito come from Spanish culinary traditions. 2. Bold and Spicy Flavors Many Caribbean dishes are known for their bold flavors, often featuring a combination of heat (from hot peppers like Scotch Bonnets), sweetness (from tropical fruits), and aromatic spices (like allspice and cinnamon). 3. Jerk Cooking One of the most famous Caribbean cooking methods, especially from Jamaica, jerk involves marinating meat (often chicken or pork) in a spicy mixture of Scotch Bonnet peppers, allspice, thyme, and garlic, and then slow-cooking it over a fire or grill. While I like the flavor of Jamaican jerk, it is sometimes too spicy for me. 4. Hearty and Filling Many Caribbean dishes are hearty and filling, using starchy ingredients like plantains, yams, and rice to create satisfying meals. Stews and soups are also very common. 5. Street Food The Caribbean has a strong street food culture. Popular street foods include: * Doubles (a Trinidadian dish of curried chickpeas in fried dough) * Patties (Jamaican pastry filled with meat or vegetables) * Bake * Shark (fried shark served in bread) 6. Use of Fresh, Local Ingredients Because of the tropical climate, fresh, locally grown fruits, vegetables, and seafood are widely used, contributing to Caribbean dishes' vibrant and fresh taste. 7. Stews and Curries Stews and curries are central to Caribbean cuisine, often made with various meats (goat, chicken, beef), vegetables, and beans. The use of coconut milk in these dishes adds a creamy richness. Popular Dishes Jerk Chicken Chicken marinated in a spicy jerk sauce made from Scotch Bonnet peppers, allspice, and other spices, then grilled or smoked. Ackee and Saltfish Jamaica’s national dish is made with salted cod and ackee, a tropical fruit that resembles scrambled eggs when cooked. Rice and Peas A Caribbean staple made with rice and kidney beans or pigeon peas, cooked in coconut milk and seasoned with thyme and scallions. Callaloo A leafy green vegetable (like spinach) is used in soups or stews, particularly in Trinidad and Tobago and Jamaica. Curry Goat A dish of tender goat meat cooked in a flavorful curry sauce served with rice or roti. Pastelón A Puerto Rican casserole made with layers of sweet plantains, ground meat, and cheese, similar to lasagna. Pelau A Trinidadian one-pot dish with rice, chicken, pigeon peas, and vegetables, cooked with coconut milk and spices. Ceviche In the Spanish-speaking Caribbean, ceviche is a popular seafood dish with raw fish marinated in citrus juice, onions, cilantro, and peppers. This is one of my favorite dishes. Doubles A Trinidadian street food consisting of two pieces of fried flatbread filled with curried chickpeas. Customs 1. Communal Meal Caribbean culture strongly emphasizes family and community, and meals are often communal events, especially during celebrations and festivals. Large gatherings around food are common, with dishes served family-style. 2. Carnival and Festival Foods Caribbean cuisine is central in festivals, especially Carnival, where special foods are prepared, including street snacks like doubles, jerk chicken, and roti. Carnival is celebrated in various countries like Trinidad and Tobago, Jamaica, and Barbados, and food is a significant part of the festivities. 3. Influence of Religion and Holidays Certain foods are associated with religious and cultural events. For example, fish is typically consumed instead of meat in predominantly Christian islands during Easter. During Christmas, dishes like black cake (a fruit cake soaked in rum) are enjoyed. 4. Sunday Lunch Tradition In many Caribbean countries, Sunday lunch is a special meal shared with family, often featuring stewed meats, rice and peas, and a variety of sides. It’s a time for family gatherings and relaxation. 5. Roti Shops and Street Food Culture Roti (a flatbread filled with curried meats or vegetables) and other street foods are popular in Caribbean countries like Trinidad and Guyana. These convenient foods reflect the region’s multicultural influences, mainly Indian cuisine. 6. Rum and Beverages Rum is the drink of choice throughout the Caribbean, with each island producing distinct varieties. It’s used in cooking and enjoyed as a drink. In addition to rum, sorrel (a hibiscus-based drink), mauby, and ginger beer are popular beverages. Modern Trends Farm-to-Table Movement Like much of the world, the Caribbean is seeing a growing movement toward sustainable, locally sourced food, emphasizing fresh, organic ingredients. Fusion Cuisine As Caribbean food gains international recognition, there’s a trend toward fusion dishes that blend traditional Caribbean ingredients and cooking techniques with global influences. Health-Conscious Options With more attention to healthy eating, Caribbean cuisine is adapting to include lighter and vegetarian versions of classic dishes while maintaining bold flavors. Takeaway Caribbean cuisine celebrates vibrant cultures, rich history, and bountiful natural resources. From spicy jerk chicken in Jamaica to tasty doubles in Trinidad, Caribbean food is full of bold flavors and exciting dishes, making it one of the most delicious cuisines in the world. My taste buds are yearning for some Caribbean food. Think I’ll see if I can find some here in the Valley of the Sun. The Ageless Adventurer is a reader-supported publication. To receive new posts and support my work, consider becoming a free or paid subscriber. This is a public episode. If you'd like to discuss this with other subscribers or get access to bonus episodes, visit juliedieboltprice.substack.com/subscribe (https://juliedieboltprice.substack.com/subscribe?utm_medium=podcast&utm_campaign=CTA_2)
19 Sept 2024
Gourmet Travel - Exploring French Cuisine
As a travel writer with a special section on my blog about Gourmet Travel (https://phototravelwrite.com/gourmet-travel/), I’m exploring world cuisines. I’ve been to France several times. Here’s what I learned from boots-on-the-ground and first-hand experience. French cuisine is world-renowned for its finesse, sophistication, and deep-rooted traditions. It encompasses various regional cuisines and styles, from rustic and hearty fare to elegant and complex dishes. France's culinary tradition is built on high-quality ingredients, classic cooking techniques, and a balance of flavors and textures. Here's an overview of French cuisine's main ingredients, characteristics, and customs: Exploring French Cuisine - Main Ingredients * Dairy - Butter and Cream Essential for sauces, pastries, and cooking. French butter is often richer and used generously in cooking. - Cheese France is famous for its vast variety of cheeses (over 400 types), including Brie, Camembert, Roquefort, and Comté. * Bread and Pastry - Baguette The quintessential French bread, crispy on the outside and soft on the inside. - Croissants and Pastries Buttery and flaky, served for breakfast or dessert. Pastry-making is a highly regarded skill in France. * Meat and Poultry - Duck (Canard) Particularly in dishes like Duck à l'Orange and confit de canard. - Pork Used in charcuterie, sausages, pâtés, and rillettes. - Beef and Veal Central to iconic dishes like steak frites, Boeuf Bourguignon, and veal blanquette. * Seafood - Fish Trout, sole, and cod are often prepared simply with butter or cream-based sauces. - Shellfish Oysters, mussels (moules marinières), and lobster are popular, especially along the coast. * Vegetables - Potatoes Common in gratins, soups, and as a side dish. - Mushrooms Such as truffles, chanterelles, and button mushrooms are used in sauces and stews. - Leeks, carrots, and onions Frequently used in soups, stocks, and stews. * Herbs and Spices - Thyme, rosemary, tarragon, and parsley is used in French cooking for flavoring. - Herbes de Provence A mix of dried herbs like thyme, rosemary, and lavender, commonly used in Southern France. * Wine and Spirits - Wine Wine is both a key ingredient in cooking (red and white wine for sauces, stews, and braising) and a typical accompaniment to meals. - Cognac, Armagnac, and Calvados Often used in desserts, sauces, or flambé dishes. * Stocks and Broths A foundational element in many French dishes, with sauces and soups often built from scratch using rich stocks made from bones, vegetables, and herbs. Exploring French Cuisine - Characteristics * Complexity and Technique French cuisine is often associated with elaborate cooking techniques such as braising, sautéing, roasting, and flambéing. Mastering sauces, pastries, and the perfect balance of ingredients is a hallmark of French cooking. 2. Regional Diversity - Northern France (Normandy and Brittany) Known for dairy products (butter and cream), seafood, and apple-based dishes (cider, tarte Tatin). - Southern France (Provence, Languedoc) Lighter and Mediterranean, featuring olive oil, garlic, tomatoes, fresh herbs, and seafood. - Eastern France (Alsace, Lorraine) Influenced by German cuisine, featuring hearty dishes like Choucroute (sauerkraut) and quiche. - Central France (Burgundy and Lyonnais) Rich stews, red wine-based dishes, and sausages are common here. 3. Sauces Sauces are a central element of French cuisine. Five "mother sauces" in French cooking–Béchamel, Velouté, Espagnole, Sauce Tomat, and Hollandaise–start many secondary sauces. 4. Presentation and Artistry French food is often as much about aesthetics as taste. Artfully plated meals showcase the attention to detail. 5. Emphasis on Fresh, Seasonal Ingredients French cooks often build their menus based on what’s fresh and in season. Local markets are popular throughout France for their seasonal produce. 6. Pastries and Desserts French cuisine is famous for its desserts, from delicate pastries like éclairs and mille-feuille to rich custards like crème brûlée and tarts such as tarte aux fruits and tarte au citron. 7. Wine Pairing In French culture, wine is an integral part of the dining experience. Specific wines complement particular dishes, and the balance of flavors is key to the wine pairing. Popular Dishes * Boeuf Bourguignon A rich, slow-cooked beef stew with red wine, onions, and mushrooms, typical of Burgundy. * Coq au Vin Chicken braised with wine, mushrooms, and onions. * Ratatouille A Provençal vegetable stew made with eggplant, zucchini, peppers, and tomatoes. * Quiche Lorraine A savory tart with a custard filling of eggs, cream, and bacon or ham. * Crêpes Thin pancakes can be savory (with ham and cheese) or sweet (with chocolate, fruit, and sugar). * Escargots Snails are usually cooked with garlic butter, and herbs. * Tarte Tatin An upside-down caramelized apple tart. Customs * Meals as Social Events In France, meals are a significant part of social life, typically lasting for hours, especially during dinner. Slowly savoring food during meals and conversation between courses means meals are not rushed. * Formal Dining Structure Structured French meals come in courses: entrée (appetizer), plat principal (main course), fromage (cheese course), and dessert. Meals may also include an apéritif (pre-dinner drink) and digestif (post-dinner drink). * Importance of Bread Bread, especially baguettes, is a staple at every meal and often served with butter. It is common to place bread directly on the table rather than on a plate. * Cheese Course Cheese is traditionally served between the main course and dessert. It is often eaten on its own or with a bit of bread but rarely with crackers or accompaniments like fruit. * Wine and Water Wine is typically served with meals and water (often mineral water). Expect a glass of red or white wine with lunch or dinner. * Market Culture Fresh food markets play an essential role in French life. Many people shop daily for fresh bread, produce, meat, and cheese, emphasizing the importance of quality ingredients. * Sunday Lunch A tradition in many French families is to have an elaborate Sunday lunch, often featuring multiple courses and including the extended family. This meal can last for several hours. * Dining Etiquette French culture regards dining manners highly. Keep hands above the table to be polite, and don't start eating until everyone has been served. Exploring French Cuisine - Modern Trends Bistronomy Bistronomy is a fusion of bistro and gastronomy, focusing on high-quality food in more casual, affordable settings. Young chefs are reinterpreting traditional French dishes with a modern twist. Focus on Health and Sustainability There is a growing movement toward lighter, healthier options and an emphasis on locally sourced and sustainable ingredients. French cuisine combines elegance, tradition, and regional diversity, making it one of the most celebrated culinary traditions globally. Whether enjoying a simple baguette with cheese (or with chocolate, my favorite) or indulging in a multi-course feast, French food is about appreciating both quality ingredients and the pleasure of dining. See more features in our Gourmet Travel (https://phototravelwrite.com/gourmet-travel/) section. Thanks for reading Shorts From A Short Girl! This post is public, so feel free to share it. Shorts From A Short Girl is a reader-supported publication. To receive new posts and support my work, consider becoming a free or paid subscriber. Note: The podcast was AI-generated from this article source. This is a public episode. If you’d like to discuss this with other subscribers or get access to bonus episodes, visit shortsfromashortgirl.substack.com/subscribe (https://shortsfromashortgirl.substack.com/subscribe?utm_medium=podcast&utm_campaign=CTA_2)
13 Sept 2024
How Uncontrolled Blood Pressure Forced My Health and Wellness Journey
I knew it could be done; I just needed direction and determination. I believed I could manage my blood pressure through diet and exercise, just like I had successfully done three years ago. But this time, I fell short—I didn't follow a good diet, and I didn't exercise the way I should have. It's frustrating, and I feel like I let myself down. I'm sure many of you can relate to this feeling of disappointment when we don't meet our own expectations. What Started the Journey When I went in for a routine colonoscopy, my blood pressure was wildly out of control. Stress because of the procedure, as well as the four-day preparation for it, was the cause. I got a verbal spanking from the anesthesiologist because my blood pressure was so high, and I wasn't taking any medications or other remedies for it. He stated he could bring my BP down for the procedure but strongly advised me to do something about it afterward. That's when I should have left the scene. I didn't, however, and went through with the procedure. Post-Op After the procedure, on the way home from the medical facility, I exhibited heart attack symptoms. Rushing to the Urgent Care Emergency Room, I spent several hours being tested and waiting for results. The results indicated a heart attack and an ambulance took me to the Cardiac Care Unit of a hospital over an hour away from home. That was the only bed available in the Valley of the Sun. After two nights of constant monitoring and more tests, the doctors determined that I was dehydrated from the colonoscopy preparation, which caused the heart lining to thicken. It was difficult for my heart to pump enough blood through my system and caused demand ischemia–not a heart attack. The whole time I was in the hospital, an IV drip was in my arm. They started me on blood pressure meds and aspirin to stabilize me. When I was finally discharged, the doctors made it clear that I needed to see the attending physician for a follow-up and stay under cardiac care. It was a sobering moment, a reminder that my health now demanded more attention. Further Complications A week later, I experienced a severe bleeding issue and was rushed to the Urgent Care Emergency Room again. The doctor and staff weren't fully aware of the severity of my condition–they seemed to minimize my symptoms. After performing a CAT scan, they couldn't find anything conclusive other than some fluid in my bowels, which they assumed might be diarrhea. Just as they were preparing to discharge me, I suddenly couldn't breathe, and my blood pressure plummeted. I was losing blood rapidly, and the medical team quickly scrambled to insert IVs for a blood transfusion and other essential fluids. I ended up at another hospital, but all they did was take blood tests until I finally refused. After two nights of getting no real treatment, I insisted on being discharged. Thankfully, I didn't need urgent care because they just left me in a bed and closed the door. They discussed doing a colonoscopy the next morning (Day 2), so I followed the prep instructions, eating only broth and Jello. But the procedure never happened. Instead, the hospital doctor told me I could go home that afternoon. Later, the gastroenterologist Physician's Assistant brought in another doctor, who strongly suggested I stay another night, which I reluctantly agreed to. By the second morning (Day 3), after refusing two more blood draws—since my readings were stable, showing no signs of internal bleeding—I insisted on being discharged. Though they weren't pleased, they finally agreed, but it took until 12:30 pm to be released. Months of Reactions to Prescribed Medications From November through February, I had reactions from the blood pressure meds, like rashes and itching–to distraction. I underwent allergy testing (all the results were negative for allergies of any kind) and dermatologist appointments, trying to find the cause. I refused to take cholesterol medicine and a second blood pressure medicine because I didn't like the way it made me feel. With all the commercials about prescribed drugs and their side effects, I didn't want to subject myself to that. Plus, the medicine wasn't bringing my blood pressure down to normal. My Primary Care Physician ran out of care options and wrote a referral to a mental health professional for counseling. This referral, I also refused. Taking Matters into My Own Hands At that point, I decided to take matters into my own hands. I got a referral from a friend for a naturopathic doctor, who ordered extensive blood testing outside the scope of regular lipid panels. (Naturopathic doctoring is not covered by insurance.) Startling discoveries in my blood were revealed, one of which was mercury poisoning. I'll cover this in a future post. This was the moment I decided to take control of my health journey. My naturopath and I agreed on a course of action, which was a six-month detoxification program with clean eating and supplements. It began on July 1–the month I turned 70 years old. Within three days, my blood pressure was coming down, and I was making plans to get off blood pressure meds. Here’s the liver cleanse (https://shortsfromashortgirl.substack.com/p/this-is-my-step-by-step-guide-to?r=om4ah) that I started early in the detox program. It wasn’t as bad as I thought it would be. Bringing My Primary Care Physician Into My Plan I brought my Primary Care Physician into my plans because one can't NOT have a PCP in the health care system. He supported my decision, acknowledging that he hadn't found a solution. We agreed that I would begin gradually reducing the dosage of the blood pressure medication he had prescribed. Victories On September 5, I stopped the one prescription blood pressure medicine because my BP was below average for several days in a row, and I was afraid it would go too low. I was relieved and experienced a sense of accomplishment. Soon, I will have another blood test and report to my PCP. The detoxification program continues for the next three months and includes regular progress reports and consultations with my naturopathic doctor. In the first two months of the detox and clean eating program, I dropped 18 pounds. It hasn't been easy. I'm changing a lifetime of eating habits and indulgences. But the results are encouraging, and I'm motivated to continue on this path. Throughout this journey, I've held onto one belief: I knew it could be done; I just needed direction and determination. I'm living proof that with the right mindset and the right support, we can take control of our health and make significant improvements. Biggest Fear My biggest fear is losing my determination for the lifestyle I'm committed to now. Our society eats highly processed foods and encourages overconsumption. Caution is the name of the game, and that is tiring. I constantly remind myself of my condition in this last year. I must remember my "why". The Health Journey Continues My health journey continues because of the mercury poisoning discovered in my blood test and other health issues. But those stories are for another day. Takeaways Realize that we are responsible for our own health. Realize that doctors practice medicine as they learned–prescribe drugs to fix a symptom. Realize that natural healing is a way of life and is beneficial to humans, animals, and the planet. Realize that food plays a crucial role in our health. Realize that we don't need to eat as much as we are led to believe. Realize that clean eating is a good way of life. Shorts From A Short Girl is a reader-supported publication. To receive new posts and support my work, consider becoming a free or paid subscriber. Thanks for reading Shorts From A Short Girl! This post is public, so feel free to share it. This is a public episode. If you’d like to discuss this with other subscribers or get access to bonus episodes, visit shortsfromashortgirl.substack.com/subscribe (https://shortsfromashortgirl.substack.com/subscribe?utm_medium=podcast&utm_campaign=CTA_2)
8 Sept 2024
The 10 Most Important Things to Know About Event Photography - Episode #1
Thanks for reading Shorts From A Short Girl! This post is public, so feel free to share it. Shorts From A Short Girl is a reader-supported publication. To receive new posts and support my work, consider becoming a free or paid subscriber. To explore how we might work together or learn more about online photography classes, use this link: This is a public episode. If you’d like to discuss this with other subscribers or get access to bonus episodes, visit shortsfromashortgirl.substack.com/subscribe (https://shortsfromashortgirl.substack.com/subscribe?utm_medium=podcast&utm_campaign=CTA_2)
15 Aug 2024
A new beginning…
Welcome I’m launching this space because I want to age gracefully and help others who are going through the same things. When you have company on life’s journey, shared experiences have more meaning. My goals have changed in the last few years, and I want to maintain my zest for life and everything it brings. Short Posts I guarantee that my posts will be 200 words or less. It will be a quick read, short and concise. Please reply if the post resonates with you or if you have your own experience to add. Community I invite you to join this community where we share life experiences with no judgment and a little humor mixed with encouragement. What you can expect Free subscriptions receive one post per month. Paid subscriptions receive: * Weekly posts * Monthly online community discussion * Q&A * Periodic bonus offerings Topics: * Acoustic Neuroma * Mercury Poisoning * Detoxing * Health & Wellness * Healing with Food * Prescription Meds * Exercise * Self-Care * Mindfulness & Meditation * Aging & Senior Citizens Thanks for reading Shorts From A Short Girl! Subscribe for free to receive new posts and support my work. Thanks for reading Shorts From A Short Girl! This post is public, so feel free to share it. This is a public episode. If you’d like to discuss this with other subscribers or get access to bonus episodes, visit shortsfromashortgirl.substack.com/subscribe (https://shortsfromashortgirl.substack.com/subscribe?utm_medium=podcast&utm_campaign=CTA_2)
Podcast Authority Score: 24 / 100
A composite of feed quality, social presence, YouTube performance and engagement. Read the methodology.
- Quality
- 47
- Social presence
- 0
- YouTube
- 0
- Engagement
- 0
Host of The 10 Most Important Things to Know About Event Photography?
Claim your podcast to manage its listing and keep your show details accurate.
Pod Engine is an independent podcast discovery and analytics service and is not affiliated with or endorsed by this podcast. Artwork and show content belong to their owners. Full legal notice.
Explore this show
Podcast research with Pod Engine