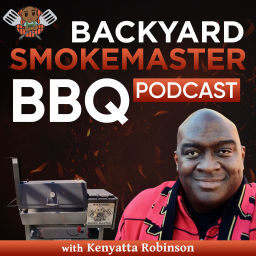
Backyard SmokeMaster BBQ
Kenyatta T. Robinson
5.0from 7 ratings
- 72
- Episodes
- 7
- Ratings
- Weekly
- Cadence
- 2023
- First episode
- 757K
- YouTube views
About Backyard SmokeMaster BBQ
Backyard SmokeMaster BBQ supports the growing community of passionate backyard barbeque enthusiasts who are interested in learning about barbeque cooking techniques, grills, smokers, accessories and delicious recipes. On a whim, host Kenyatta Robinson posted a clip on YouTube after he asked his daughter to film the arrival of his long awaited custom-built 20″ offset smoker from Lone Star Grillz. Kenyatta was surprised by the number of questions received about the smoker so he created a follow-up video where he described the features of the stick burner and and explained why he was interested in learning how to make BBQ with one. The video was well received and the channel was born in earnest back in 2018.Since then Kenyatta has amassed a number of other grills and smokers and continues to make videos about them. This podcast is an extension of the YouTube channel and is designed to give listeners another way to share in Kenyatta’s insights about BBQ.
- Publisher
- Kenyatta T. Robinson
- Category
- arts
- Language
- en
- Explicit
- No
- First episode
- 4 Feb 2023
- Latest episode
- 26 Aug 2026
Latest episodes
72 episodes in the feed.
26 Aug 2026
The Most Useful BBQ Accessories (and the Ones That Collect Dust)
Every backyard cook has that drawer. The one full of gadgets that looked great in a holiday ad and have not been near a fire since. I have one too, which is exactly why this episode needed to happen. On Episode 97 of the Backyard SmokeMaster BBQ Podcast, we walked through the barbecue accessories that actually earn their keep, and then the ones that sound great and end up buried in that drawer. Whether you have been running an offset for years or you just brought home your first smoker, the goal is the same: spend your money on the tools that make your cooking more consistent, and skip the rest. How these accessories were judged Nothing made this list because it was trendy, and nothing in this episode was a paid placement. Every accessory here is either something I own and use or something I researched heavily before I felt comfortable recommending it. The filter was simple. An accessory earns a spot if it does at least one of these things: Solves a real barbecue problem Improves consistency or efficiency Is durable and proven rather than hype driven We all fall for the hype sometimes. It is easy to do. These are the tools that survive contact with an actual cook. They fall into five buckets: fire and temperature control, prep and workflow, monitoring and feedback, cook and turn, and resting, holding, and serving. Then we will get into the ones I consider overrated or situational. One quick note before we get into the list. Some of the product links in this post are affiliate links, which means Backyard SmokeMaster BBQ earns a small commission if you buy through them. It does not cost you a penny extra, and it does not change what makes this list or where anything ranks. Nobody paid to be included. If a link here helps support the podcast, I appreciate it. Fire and temperature control These are the accessories that stabilize heat. If your temperatures are swinging, nothing downstream of that is going to save the cook. Water pans Starting with one that costs you nothing, because you already have it at home. A water pan adds thermal mass inside the cooker, absorbing and releasing heat gradually. That smooths out temperature swings and gives you a more stable cooking chamber. Best used in: bullet smokers like the Weber Smokey Mountain, cabinet smokers, and offsets in dry conditions. Fire bricks Another cheap one. You can pick up a brick at the hardware store for four or five dollars. Fire bricks store and radiate heat slowly once they come up to temperature, which helps hold your temps through long cooks, reduces recovery time after you open the lid, and improves fuel efficiency. Best used in: kamados, gas grills when you are cooking indirect, and kettle grills. Gasket kits and door seals This one is genuinely practical. Gaskets and seals eliminate the air leaks that cause temperature swings. Close the leaks and your fuel goes further, and every vent adjustment you make actually means something. Best used in: older offsets, kamados with worn seals, and budget smokers. That is my friendly way of saying the cheaper cooker some of us bought when we first got excited about barbecue. If your gaskets are worn down or peeling away, this is your upgrade. You cannot control the heat if air is leaking everywhere. That is the whole problem gaskets solve. Insulation blankets When it is freezing or windy outside, an insulation blanket reduces heat loss, stabilizes your temperatures, and cuts your fuel consumption. Depending on how cold and how windy it gets where you live, this can be the difference between cooking in winter and giving up until spring. Best used on: pellet grills and kettles. Charcoal baskets A charcoal basket controls your fuel burn rate and the airflow around the fire. It prevents uneven fuel consumption, enables longer and steadier burns, and helps you maintain a consistent coal bed. Think of it this way: a clean, contained fire is a stable fire, and a basket goes a long way toward getting you there. Prep and workflow These are the accessories that save you time before the food ever hits the grate. Disposable cutting boards I want to spend real time on this one, because it is one of the cheapest upgrades on this entire list and one of the most useful. Here is what disposable cutting boards do for you: They speed up transitions. When you are prepping multiple proteins back to back, any time you do not have to stop and reset is time saved. They reduce cross contamination risk. Raw poultry, pork, and beef can each get their own board. No wondering whether the board was fully sanitized between proteins. They protect your good boards. The fat and the constant cutting wear down the expensive board you bought. Let the cheap one take that abuse. They are ideal for high mess trimming. Brisket and poultry trimming is messy by nature, and a disposable board contains it. They simplify cleanup. Roll it up, toss it, you are done. They are great for outdoor prep. They are thin and light, about like a piece of cardboard, so they are easy to carry outside and you never have to haul a heavy board back in to wash it. One question that came up from the live crew was disposal. They are pliable enough that I fold mine down small and they go straight into a regular kitchen trash bag without any trouble. No need for contractor bags. A dedicated prep cart or rolling table Walking back and forth to the house is wasted motion, and it wears on you over a long cook. A dedicated barbecue prep cart or rolling table keeps everything in arm’s reach so you are not making ten trips inside for the one thing you forgot. Best used for: outdoor prep setups and high volume or repeat cooks. Want to go deeper on any of this? We talk about our favorite accessories, grills, smokers, and technique all week long inside the free Backyard SmokeMaster Society. There is no reason to go through your barbecue journey alone. It takes about 30 seconds to join at backyardsmokemaster.com/society (https://backyardsmokemaster.com/society). Monitoring and feedback This category is about taking the guesswork out of barbecue, and it is where I would tell most people to spend their money first. The instant-read thermometer If you buy one thing on this list, buy this. An instant-read tells you when to act, not just what temperature you are at. It confirms doneness so you are not guessing, and it gives you objective information instead of a hunch. A leave-in probe monitors the trend during the cook, but it sits in one spot in one piece of meat. An instant-read lets you check several locations and see which part of the protein is running ahead of the rest. Probes tell you the story. Instant-reads confirm the ending. Where it earns its keep: Thin or fast-cooking proteins. Chicken, turkey breast, steaks, chops, and fish cook too fast for leave-in probes to be practical. Spot checking for evenness. Large cuts cook unevenly, and one probe location never gives you the whole picture. Learning your pit. Every read teaches you something about your cooker’s hot spots, its airflow, and how your fire management is actually behaving. This is one of the few tools that genuinely pays for itself. Save one cook from overcooking and it has covered its cost. And the probe is thin enough that it leaves no noticeable mark in your meat. I run the Typhur instant-read (https://amzn.to/3UTOFqg), the ThermoWorks Thermapen (https://amzn.to/4gSfrYD), and the Fireboard Spark, and they are all excellent. You can also get a solid instant-read for 20 or 25 dollars. I do not have a strong preference here. Just get one. Remote ambient temperature probes These give you real-time pit temperature feedback without opening the lid. Less unnecessary lid lifting, more proactive adjustments, and over time a real feel for how your pit behaves. Best used on: every type of smoker and grill. Knowing the ambient temperature in your cooking chamber is valuable no matter what you are cooking on. My two favorite accessories right now Neither of these was on my radar, and both turned into unexpected hits. Again, neither is sponsored or endorsed. I just like them. Typhur Gold wireless probes. This set comes with four probes (https://amzn.to/4xxe7Ag), and they are numbered, which is far handier than it sounds once you have them inserted into several different proteins. They are not as thin as the ThermoWorks RFX, but they are not thick either. The charging base doubles as a display, so I get instant readings on the unit itself without reaching for my phone, and the connection has been solid. The app is easy, you can set the cook up on the handheld or in the app, and it will estimate a finish time. I do not lean on the prediction much, but it gives you a general idea. I expected the RFX to be my favorite wireless probe this year. The Typhur took that spot. If you could combine the RFX probe design with the app experience some of the others offer, you would have the perfect wireless probe, and I think the Typhur gets closest. For the record, I also bought the Fireboard Pulse earlier this year and it left me a little underwhelmed. That is my experience with it, and your mileage may vary. I have liked just about everything else Fireboard has done. ChefsTemp ProTemp S1. This one replaces the built-in thermometer (https://amzn.to/4d4NfiX)in whatever grill or smoker you have. It screws right in where the factory dome thermometer was and gives you a big, backlit digital readout of the ambient temperature that is easy to read from across the yard. I liked it enough that I bought two for my full-size Smokeslinger, one for my Liberty 94 offset, and then a fourth that is probably going into my Weber Smokey Mountain (https://amzn.to/4y1q5SE). Between the two, the ChefsTemp (https://amzn.to/4y2C6an)tells me what my cooking chamber is doing and the Typhur (https://amzn.to/45OOdfq)tells me what the meat is doing. That is most of what I need to know during a cook. Cook and turn Tools that make handling food safer and cleaner. Long locking barbecue tongs Cheap, easy to find, and they matter. Long tongs keep your hands away from the heat and flare-ups, and the locking feature keeps the business end off the table when you set them down. Good tongs give you distance and control, and both of those matter. Food-grade nitrile gloves Clean transitions between tasks. They limit cross contamination and keep your handling and hygiene consistent from prep through service. We are big on food safety around here, and this is one of the easiest ways to protect yourself. Resting, holding, and serving This category is about carryover control, which really means keeping food hot without overcooking it after it leaves the pit. Breathable wraps, also known as pink butcher paper Butcher paper slows heat loss without sealing it in, balancing carryover and moisture retention. In the age-old butcher paper versus foil debate, I come down on butcher paper for most cooks because it breathes and it does not change how the meat finishes. Foil still has its place with certain proteins, especially if you want ribs more tender. But for most of what I cook, it is paper. Cambro-style insulated carriers, used correctly Cambros (https://amzn.to/4qWBNfj) are outstanding for holding, and they can hold as many full-size hotel pans as you can stack. But they should only be used after carryover has already stabilized, and this is where people get burned. Here is the scenario. You smoke a brisket for 14 hours, pull it at 203 or 204 internal, let it rest for what feels like long enough, and put it in the Cambro at 190. A hot box locks in whatever temperature you put into it. Six hours later you pull that brisket out and it is still 190 degrees, and when you go to slice it, it falls apart. You end up with chopped brisket instead of slices that hold together when you drape them over your finger. Monitor the internal temperature and let carryover finish before the meat goes into the Cambro. They are a little pricey, but this is another accessory that pays for itself over time. A cooler and dry towels If a Cambro is not in the budget, you probably already have a cooler. Dry towels, not steaming towels, add gentle insulation and prevent rapid heat loss after venting. Towels will not stop carryover, but they are good for holding. Heavy-gauge aluminum sheet pans This one I learned while researching the episode. Heavy aluminum sheet pans conduct heat away from the meat faster than a cutting board does, which helps stabilize the temperature early in the rest. Metal pulls heat out of the meat more quickly than wood or plastic sitting under it. Leave the probe in during the rest This is something I started doing and I am glad I did. Do not pull your leave-in probe when the meat comes off the pit. Leave it in and watch the rest. You will see the temperature keep climbing, you will see exactly where the peak of the carryover is, and you will see the moment it starts falling back. If you are not watching the rest, you are guessing. We have the technology to stop guessing. Overrated or situational accessories These are the tools that sound useful and rarely get used. Oversized rib racks The pitch is that a high-capacity rack holds more racks at once and maximizes your grill space. In practice they promote uneven cooking, loading them is awkward, and your ribs usually need to be rotated anyway depending on where they sit in the smoker, which often means pulling them out and repositioning them. They may save space at the start, but they cost you control. Built-in grill lights The pitch is hands-free lighting that is always attached to the grill. The reality is usually a poor lighting angle, dim output, and batteries that die quickly. A headlamp beats a built-in grill light every time, and a good one does not cost much. Multi-tool barbecue utensils These show up in my social feeds every year around Black Friday. One tool that does everything, fewer items to manage. But they tend to be heavy, the grip is awkward, and a tool that does five things usually does none of them especially well. Dedicated burger presses The pitch is uniform patties and faster prep. In practice, hand forming is faster, and presses often overcompact the meat. Uniformity is not always better. Built-in smoker boxes on gas grills Gas grills are not designed to produce smoke flavor, and a built-in smoker box is how some manufacturers try to address that. The smoke production tends to be limited and they need frequent refills. An inexpensive foil packet often works better. Built-in does not always mean better. The question to ask before you buy Here is the filter I keep coming back to. If a tool does not reduce your time, your effort, or your risk, it usually ends up in the drawer. Run any accessory through that question before you spend the money. The ones that clear it, like a good instant-read thermometer, a stack of disposable cutting boards, or a set of long locking tongs, will keep earning their place on your table for years. Now I want to hear from you. What accessory do you reach for on every single cook, and what did you buy that is collecting dust? Drop it in the comments. And if you want to keep the conversation going all week, come join us in the free Backyard SmokeMaster Society at backyardsmokemaster.com/society (https://backyardsmokemaster.com/society).
24 Aug 2026
BBQ Talk With Captain Ron: Stories, Tips, and Live Q&A
Every so often a guest comes on the show and you can tell inside of five minutes that the hour is not going to be long enough. Episode 96 was one of those. My guest was Captain Ron (https://www.instagram.com/captainroncooks/), a cook I first noticed a few years back in videos he was making for Fogo Charcoal, almost always standing over a Big Green Egg with more energy than anybody else on my feed. He has since launched his own channel, Captain Ron Cooks (https://www.youtube.com/@CptnRon302), and he came on to talk about how he got here, what he sees backyard cooks doing the hard way, and to take questions live from the chat. https://www.youtube.com/watch?v=XpPDCYHGReY From a bullet smoker to a full-time barbecue career Ron started the way a lot of us did. He always liked to cook, he started really liking barbecue food, and he figured he could save himself some money by learning to make it at home. That meant a cheap bullet smoker first, then a Big Green Egg he got for his birthday. His daughter told him to start an Instagram account, he did, and things went from there. The turning point was an Eggfest in Melbourne, Florida. In his words, that took him from “I like to do this” to hooked. A few years later, Fogo asked him to come down and shoot a couple of videos. Then the pandemic hit, everybody was home cooking outside, and the company had more work than it could film. What started as two videos turned into a full-time job, right at the moment his old travel-heavy career came to a stop. He is not with Fogo anymore, but he is quick to say he is grateful for the run. Cook to temperature, not to time I asked him the mistake he sees beginners make over and over, and he did not hesitate: following the clock instead of the thermometer. Buy a pork loin, read “cook 120 minutes” on the label, set a timer, and hope. He says the day he started cooking to internal temperature was the day his food changed. His two must-do items are simple. Cook to temp, not to time, and get yourself a good instant-read digital thermometer. Regulars here know I say the same thing about every other episode, and Ron made the point better than I do: he has cooked steaks expensive enough that guessing by feel was never an option. Swallow your pride and use the thermometer. Simple food tends to win His barbecue philosophy is that a lot of us overcomplicate it. He learned that the hard way at Eggfests. Early on he was building stuffed sliders with a long ingredient list, a lot of prep, and a lot of mess, and finishing fifth or sixth. Then he switched: roast a whole New York strip or a tomahawk with a rub, smoke it, and all day long slice a steak off it and caveman sear it right on the coals. He started winning. He said something similar about the more extreme content going around, like dry-aging a steak in caramel sauce. He is not knocking the people doing it, and some of them are doing very well with it. His take is that it is entertainment more than cooking, and it may not be moving the barbecue world forward much. Learn your vents before you reach for a controller Ron is not a fan of fan-driven temperature controllers for backyard cooking, and he said it knowing it might not sit well with everybody. His reasoning is that the controller can do your learning for you. He loves the fire management and the vent management, and he thinks leaning on the fan can keep you from picking up that skill. He does allow there is a time and a place. If you are paying travel and entry fees at a competition and you need 225 and not 227 all night, that is a different situation. But for a backyard cook, he would rather you learn the intake and the chimney on whatever you own, because every cooker works the same basic way. I told him about putting a fan controller on my first offset, which taught me the same lesson from the other direction. Those wood splits burn the way they burn. Light the fire at the bottom, not the top This one I am going to try. Most of us fill the firebox with charcoal and light it on top. Ron pointed out that the fire then has to burn down to reach the oxygen coming in through the bottom vent. So he flipped it: light a small fire at the bottom, get it going, add a chunk, then pour the rest of the charcoal on top. Now the air coming in the bottom vent hits the fire directly instead of fighting its way up through the pile. That changed where he puts his smoke wood too. He is leaning toward chunks in and under the charcoal rather than on top, since the food takes on most of its smoke in the first couple of hours anyway. He is honest that there is an argument for both placements. Fat side up or fat side down? Depends on the cooker Pork butt, he goes fat cap up every time. Brisket is where the cooker matters. On a kamado the heat comes straight up from below and the deflector plate gets very hot, so he cooks brisket fat side down to protect the bottom. He has cooked plenty of good briskets fat side up, but on the kamado he found the bottom would char and stick to the grates. He also pushed back on the old idea that the fat renders down through the meat and bastes it, which has not held up when people have tested it. Off the kamado, he is fat side up most of the rest of the time. I cook most of my briskets on the offset, fat side up, somewhere between 225 and 275 and usually landing around 245 to 250. Ron cooks his at 250 too. Questions from the live chat Which size Big Green Egg? He started on a large and still has it, but he is a fan of the XL. On the fuel-hog objection, he says they ran a five-hour burn test and the difference in charcoal used came out to a few ounces. His view: you can have too little cooking surface, but you cannot have too much. He also likes the MiniMax for the nights it is just him and one other person, though at 75 pounds it is only portable up to a point. Salmon on the Egg? His favorite is direct on a cedar plank. Soak the plank a couple of hours, get a medium-hot fire, char one side of the plank, flip it, and lay the salmon on the charred side. You get the wood flavor plus crispy skin. Indirect, he runs about 250 with a light herb or dill-based seasoning and only a block or two of wood. He wants a kiss of smoke, not a heavy one, and he treats smoke as an ingredient the way you would treat salt. Weber kettle or Smokey Mountain? The kettle is the more versatile of the two since you can grill and smoke on it. The WSM, in his experience, cooks somewhere between a kamado and a barrel smoker, and he has been happy with the one he picked up this year. Cold weather on a ceramic cooker? Dress warm, first of all. Beyond that, expect to open your vents a little more when the ceramic is cold, and turn the bottom vent away from the wind. The tip worth writing down: when you shut the cooker down after a cold-weather cook, lay a piece of aluminum foil between the dome and the base before you close it. Otherwise the gasket can freeze to itself, and you will be out there with a putty knife trying to open it. Be social on social media We spent a good stretch on the community side of this, and it was my favorite part of the conversation. Ron credits a list of people who helped him early, including Chris Sussman of The BBQ Buddha (https://www.instagram.com/the_bbq_buddha/), Ray Lampe of Dr. BBQ (https://www.instagram.com/realdrbbq/), Mel from Dark Side of the Grill (https://www.instagram.com/darksideofthegrill/), and Chris Grove of Nibble Me This (https://www.instagram.com/nibblemethis/), and he tries to pay it back now. The message he says means the most is somebody telling him they were ready to sell their cooker, watched a few of his videos, and now the family comes over every Sunday. His advice for anybody trying to grow: it is called social media, so be social on it. Go to other people’s pages, like their work, leave a real comment, and be yourself even if you are not everybody’s cup of tea. And do not gatekeep. He proved the point live. A friend had driven four and a half hours from Tampa that same afternoon, on his own dime, with a ribeye roll, just to help him film a holiday video the next day. Where to find Captain Ron His channel is Captain Ron Cooks on YouTube (https://www.youtube.com/@CptnRon302), and he is moving his other handles over to that name. He says he answers just about every question he gets, so if you have one, ask him. Ron, thank you for coming on, and this will not be your last appearance if I have anything to say about it. If you missed the live show, the replay is up on YouTube and the audio version goes out on your favorite podcast app. And if you want to keep this conversation going with other people who take their backyard cooking seriously, come join us in the Backyard SmokeMaster Society (https://backyardsmokemaster.com/society). It is free, it is not on Facebook, and nobody there is going to tell you your questions are too basic. Get out there and put some smoke on something.
22 Aug 2026
Proven Smoking Woods and the Right Time to Use Them
Most backyard cooks obsess over rubs, sauces, and injections — and then throw whatever wood is in the garage on the fire. That’s backwards. Smoke is the one ingredient you can’t fake indoors, no matter how much liquid smoke you pour in. It carries flavor, color, aroma, and depth, and it’s the thing that separates barbecue from every other way of cooking meat. On Episode 95 of the Backyard SmokeMaster BBQ Podcast, we went deep on the woods that have proven themselves, when each one belongs on your fire, how much to use for your particular cooker, and how to keep the smoke clean from the first split to the last. Here’s the full breakdown. https://www.youtube.com/live/kRDYeIPEYoM Treat wood like an ingredient Different woods deliver different flavor strengths, from mild to bold. The magic isn’t in finding the one “best” wood — it’s in pairing the right wood with the right protein for the right length of cook. Before you get to the pairings, though, you have to get the smoke itself right. A perfect wood choice burned badly still tastes bad. Clean smoke, and why it matters more than the wood you picked Clean smoke is thin and wispy. It has a light blue tint, or it’s nearly invisible coming out of the stack. That’s your visual cue that the fire is burning efficiently. Thick, billowing white or dark gray smoke is the opposite. It’s a sign the wood is smoldering instead of burning, and that smoke leaves a bitter taste on the meat. Clean smoke equals clean flavor. Simple as that. Four airflow rules that produce clean smoke Airflow just means oxygen moving through your fire so the wood can burn cleanly. Not enough air and the wood smolders, giving you thick white smoke and a bitter finish. Too much air and the fire runs hot and fast, spiking your temperatures and putting your food at risk. These four rules apply across almost every cooker: 1. Keep the exhaust vent 100% open Your exhaust damper or chimney stays fully open, always. That lets smoke leave the cooker and pulls fresh oxygen in through the intake. Open exhaust means cleaner smoke. A closed exhaust leaves stale smoke sitting on your meat. 2. Control the fire with the intake vent The intake is your control, not the exhaust. Open it up for more oxygen, a hotter fire, and cleaner smoke. Close it down and you get a cooler, dirtier fire. If your smoke turns white and thick, open the intake more and leave the exhaust wide open. 3. Resist the urge to choke the fire This is where a lot of beginners go wrong. Temperatures start climbing, panic sets in, and the vents get shut down. That suffocates the fire and creates dirty smoke, which usually makes things worse. Let the fire burn freely and clean. 4. Control temperature with fire size, not vents You hear pitmasters say it constantly: build a small, controlled, contained fire, even when the firebox is huge. Your temperature comes from the size of the fire, the amount of fuel you’re feeding it, and how far the meat sits from the heat. On an offset, start with one or two small splits, let them fully ignite, and add another only when the previous one has burned all the way down. Then make micro-adjustments at the intake when you need them. If you want to call yourself a legitimate pitmaster, fire management is the skill to master. Everything else is downstream of it. Use seasoned hardwood — and skip the softwoods Seasoned means the wood has been dried properly, typically sitting out in the elements for six to twelve months. Seasoned hardwood burns cleanly and produces good smoke flavor. Green or wet wood burns acrid and dirty, and it’s one of the most common causes of a bitter cook. Let the wood ignite before you close the lid. Give it time to really catch. Don’t rush the fire. Avoid softwoods like pine, spruce, and cedar for smoking. Buy local. Tree services and local suppliers usually have plentiful stock of whatever grows in your area, at a much better price than importing a specialty wood. The flavor differences between good hardwoods are real, but whether they’re worth shipping costs is another question entirely. How much wood to use, by smoker type Your cooker dictates a lot: how strong the smoke flavor will be, what format of wood you can burn, how much you need, and how often you’ll add more. Two rules apply everywhere. Start light — you can always add more wood, but you can’t take smoke off the meat. And always get to clean smoke before the food goes on, because meat takes on the most smoke at the beginning of the cook when it’s coldest. Offset smoker (splits or large chunks): Start with one to two splits to build a coal bed, then add a split every 45 to 60 minutes. Splits are like snowflakes — every one burns a little differently. If a split smolders, add airflow by cracking the firebox door slightly. Kamado (chunks): Two to three chunks for low and slow, one to two for hot and fast. You rarely need to add more mid-cook since kamados trap smoke well. Worth experimenting with burying chunks at different depths in the charcoal so they light gradually, versus sitting them on top. And burp the lid before you open it at high temps. Pellet grill (pellets only): Just refill the hopper as needed. Remember that lower temperatures produce more smoke and higher temperatures produce less — and your pellet choice affects flavor more than smoke output. Gas grill (smoker box or foil pouch): Two to three chunks, or chips, added every 45 to 60 minutes, kept directly above the active burner. Electric smoker (chips): This is the one case where chips make the most sense. Start with a handful and expect to add more every 30 to 45 minutes. Electric smokers tend to produce a milder smoke. Ugly drum smoker (chunks): Three to four chunks layered throughout the charcoal basket. You’ll rarely need to add more. Drums put out a lot of smoke early, so use fewer chunks for poultry. Gravity-fed (chunks mixed into charcoal): Two to four chunks mixed in. The fire moves downward and lights them as it goes, so you usually don’t add more. Wood type matters more than quantity here — no need to run eight or ten chunks. Want to go deeper on airflow for your specific cooker? We’re building smoker-by-smoker guides inside the Backyard SmokeMaster Society (https://backyardsmokemaster.com/society) alongside resources like “11 Foolproof Steps to Smoky Perfection” and “Mastering the Art of Offset Smoker Cooking.” It’s free to join, and the conversation keeps going all week long. Come get in on it at backyardsmokemaster.com/society (https://backyardsmokemaster.com/society). The proven smoking woods and when to use each one These are in no particular order — number one isn’t a ranking. Hickory — Rich, bold, and savory; a lot of folks describe it as bacon-like. Best on pork shoulder, ribs, brisket, and beef. Blend it with a fruit wood if you don’t want it taking over. Mesquite — Strong, earthy, and smoky with a slightly bitter edge. Best on brisket, beef, lamb, and wild game. It burns hot and fast, which makes it better suited to short cooks or blends. Plenty of cooks (this one included) have ruined food early on by leaning too hard on mesquite. Apple — Mild, sweet, and fruity. Best on pork loin, ribs, poultry, and seafood. Ideal for delicate meats and sweet glazes. Cherry — Mild, sweet, slightly tart, and my personal favorite of the fruit woods. Best on chicken, ham, pork, and turkey. It adds a rich red color and mixes beautifully with hickory — and with oak, from my own experience. Oak — Medium smoke, well balanced, and about as neutral as it gets. Best on brisket, beef ribs, sausages, and lamb. Great for long cooks, beginner-friendly, burns hot, and blends with almost anything. It’s what I run most on my stick burner, mostly because post oak is easy to get here in California. Pecan — Nutty, sweet, and mellow. Best on poultry, pork, and cheese. Too much can turn bitter, so start small. Pecan and cherry on pork ribs is one of my favorite combinations. Maple — Light, subtle, and sweet. Best on chicken, pork, vegetables, and cheese. Pairs very well with apple or cherry. Worth mentioning a few that came up from the live crew: pecan and hickory are in the same family, so if you can only find one, you’ll get a lot of the same experience. Alder runs mild and works well with fish and salmon. Almond is similar to pecan and is easy to find out West. And peach, apricot, and pear all have their fans — pear reportedly burns well enough to rival oak and hickory. Mixing woods for custom flavor Blending is where it gets fun. A few combinations that have earned their spot: Hickory + cherry on ribs Oak + apple for brisket or pork loin Mesquite + pecan for game meats — earthy and sweet Pecan + cherry on pork ribs Apple + cherry + pecan on ribs, a live-crew favorite Barbecue is part art, part science, and the fun is in the experimentation. Just make sure whatever you’re mixing is good, seasoned hardwood. Final tips for getting the wood right Start light. You can always add more. You can’t take it away. Watch your smoke. Thin smoke means clean flavor. Thick smoke means bitter flavor. Know your smoker. A pellet grill, a kamado, and a stick burner all have different needs and different cadences. Use dry, seasoned wood. Wet or moldy wood is one of the fastest routes to a bitter cook. Experiment. Run a couple of cooks, change one variable, and pay attention to what you actually prefer. Get the fire right and the wood right, and everything else you do to that meat has a much better chance of landing. What’s your go-to wood, and what do you pair it with? Drop it in the comments — and if you want to keep the conversation going all week, come join us in the free Backyard SmokeMaster Society (https://backyardsmokemaster.com/society).
Reach and audience
Public platform figures. Ratings count people who left a rating, not total listeners.
- YouTube views
- 756,752
- Score snapshot 15 Sept 2025
- Apple Podcasts (US)
- 5.0 / 5
- 2 ratings
- Spotify
- 5.0 / 5
- 5 ratings
Podcast Authority Score: 65 / 100
A composite of feed quality, social presence, YouTube performance and engagement. Read the methodology.
- Quality
- 65
- Social presence
- 0
- YouTube
- 93
- Engagement
- 68
Contact Backyard SmokeMaster BBQ
- Guest appearances
- Books guests
Based on episode analysis; this does not confirm that the show is currently accepting guests.




Host of Backyard SmokeMaster BBQ?
Claim your podcast to manage its listing and keep your show details accurate.
Pod Engine is an independent podcast discovery and analytics service and is not affiliated with or endorsed by this podcast. Artwork and show content belong to their owners. Full legal notice.
Explore this show
Podcast research with Pod Engine